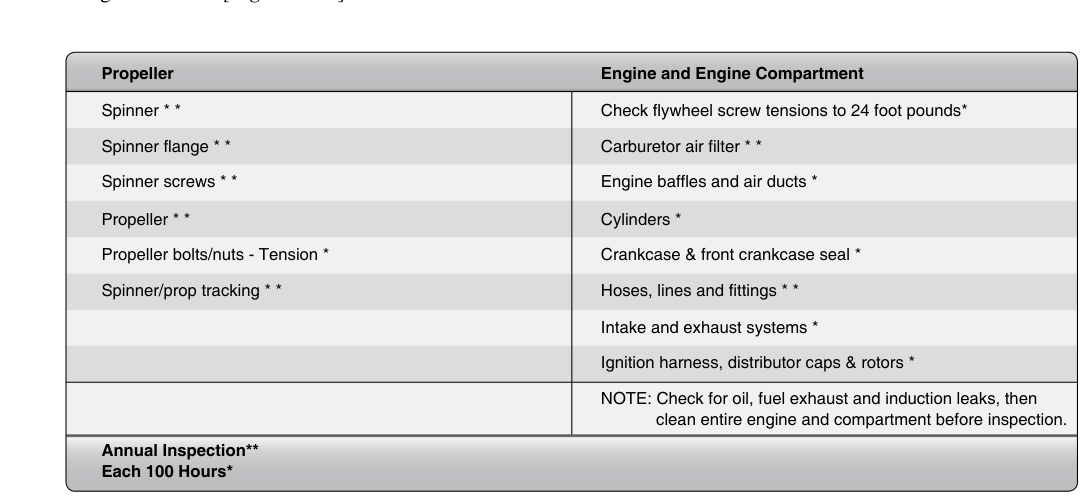
The engine mount is one of the most structurally demanding components in any powered aircraft. It must simultaneously absorb engine torque, transmit thrust to the airframe, damp vibration, and carry the deadweight of the powerplant through every maneuver and gust load the aircraft encounters. Because mounts experience cyclic stress loading throughout every flight hour, fatigue cracking is a genuine and recurring threat — and a cracked or failed engine mount can result in catastrophic powerplant separation or loss of control. For AMT candidates and working mechanics alike, mastering engine mount inspection and crack-detection techniques is not merely a test requirement; it is a foundational airworthiness skill.
This article covers the design and materials of common engine mounts, the step-by-step inspection process, and the four primary nondestructive testing (NDT) methods used to find cracks that the naked eye alone cannot reliably detect.
Engine Mount Design and Materials
Most light aircraft use welded steel tube engine mounts, typically fabricated from chrome-molybdenum (4130 chromoly) steel. Chromoly is favored because it combines high tensile strength with good weldability and a degree of ductility that allows the structure to flex rather than fracture suddenly. Larger turbine-powered aircraft typically use welded steel tube or steel/titanium alloy mount structures rather than forged aluminum, and these mounts require NDT approaches suited to their specific base metal.
The mount attaches to the firewall or forward fuselage structure at multiple hard points, distributing engine loads across the airframe. Rubber dynafocal or biscuit-type engine mount bushings (also called Lord mounts) are installed at the attachment points to isolate airframe-transmitted vibration from engine vibration and vice versa. These rubber isolators are themselves subject to deterioration — cracking, compression set, oil contamination, and delamination — and are inspected alongside the steel structure.
Pre-Inspection Preparation
Before any NDT method is applied, a thorough general visual inspection (GVI) is performed with the engine compartment cleaned. Grease, oil residue, exhaust deposits, and paint can mask cracks entirely, so the mount should be degreased and, if applicable, stripped of paint in suspect areas before close examination. Good lighting — including a bright flashlight held at a low oblique angle — is essential. Oblique lighting causes shadows to form along surface discontinuities, making even hairline cracks more visible to the naked eye.
The inspector pays particular attention to weld areas, tube intersections (nodes), and attachment fittings, because these are the highest-stress concentrations. Any sign of rust streaking, paint bubbling, or discoloration warrants further NDT. The rubber isolators are checked for obvious cracking, excessive compression, oil saturation (which degrades rubber rapidly), and any evidence that metal-to-metal contact has occurred — a telltale sign that an isolator has failed completely.
Nondestructive Testing Methods
Visual and Dye-Penetrant Inspection
Dye-penetrant inspection (DPI), also called liquid-penetrant inspection (LPI), is an accessible NDT method for non-ferrous metals and stainless steel parts where magnetic-particle methods cannot be used, but it requires a clean, bare metal surface — any paint or coating must be removed first, since a coating that seals the crack opening will prevent penetrant entry. It works on a simple principle: a highly fluid, brightly colored (or fluorescent) penetrant liquid is applied to the clean metal surface and allowed to dwell — typically 15 to 30 minutes depending on the suspected defect size and ambient temperature. Surface tension and capillary action draw the penetrant deep into any cracks or porosity open to the surface.
After the dwell period, excess penetrant is carefully removed from the surface without flushing material out of cracks. A developer — a white powder in solvent or dry chalk-like material — is then applied. The developer acts as a blotter, drawing residual penetrant back out of the crack and spreading it across the white developer background, producing a visible indication. Visible-dye penetrant systems produce a vivid red indication under normal lighting, while fluorescent penetrant systems (a distinct product, not the same penetrant viewed differently) produce a bright green-yellow indication under ultraviolet (black) light. The indication is typically wider than the actual crack, making it easier to see. DPI detects surface-open defects only; subsurface cracks cannot be found with this method.
Magnetic-Particle Inspection
Magnetic-particle inspection (MPI) is the preferred method for welded 4130 chromoly steel engine mounts because it can reveal both surface and slightly subsurface cracks in ferromagnetic materials. The part is magnetized — using a yoke, prod contacts, or a coil — and then fine iron particles (either dry powder or wet suspension) are applied. Where a crack or other discontinuity interrupts the magnetic field, flux lines are forced to the surface, creating a leakage field that attracts and holds the iron particles in a visible indication directly over the defect.
The orientation of the magnetizing field is critical: a crack parallel to the magnetic field lines produces almost no leakage and can be missed entirely. For this reason, inspectors magnetize the part in at least two directions, approximately perpendicular to each other, to ensure cracks in any orientation are detectable. Wet fluorescent MPI, viewed under UV light in a darkened area, provides the highest sensitivity. After inspection, the part must be demagnetized to prevent retained magnetism from affecting compasses or attracting ferrous debris.
Eddy-Current Inspection
Eddy-current inspection (ECI) uses electromagnetic induction. An alternating-current coil probe is placed on or near the metal surface, inducing circular electrical currents (eddy currents) in the conductive material. Cracks, corrosion, or changes in material properties disrupt the flow of these eddy currents, changing the impedance of the probe coil. An instrument displays this impedance change as a meter deflection, Lissajous figure on a screen, or audio tone, alerting the inspector to a defect.
ECI is particularly valuable for inspecting engine mount attachment fittings, bolt holes, and areas where paint or a thin coating cannot be removed, because eddy currents can penetrate through nonconductive coatings to reach the metal beneath. It can also detect subsurface cracks up to a limited depth depending on frequency — lower frequencies penetrate deeper. ECI does not require direct contact with bare metal and leaves no residue, making it clean and efficient on installed components.
Ultrasonic Inspection
Ultrasonic testing (UT) uses high-frequency sound waves transmitted into the material. Reflections (echoes) return from internal boundaries — the far wall of the part, and any internal discontinuities such as cracks, voids, or inclusions. The time-of-flight of returned echoes pinpoints defect depth. UT is most applicable to thicker, solid forgings and engine mount fittings rather than thin-wall steel tubing, where weld geometry can create confusing reflections. It requires a skilled operator and appropriate reference standards to interpret results reliably.
Key Numbers and Rules
- Dye-penetrant dwell time: typically 15–30 minutes for small cracks; follow the specific penetrant manufacturer's instructions.
- Magnetic-particle inspection directions: minimum of two perpendicular magnetizing directions to ensure all crack orientations are detectable.
- Demagnetization: required after MPI on steel parts that will remain in service near sensitive instruments.
- Rubber isolator rejection criteria: oil saturation, cracks deeper than superficial surface checks, compression set exceeding manufacturer limits, or any metal-to-metal contact evidence.
- Regulatory authority: Engine mount inspections must meet the aircraft manufacturer's maintenance manual requirements and applicable FAA Airworthiness Directives (ADs); repairs and alterations require approval per 14 CFR Part 43.
- NDT technician certification: Major NDT work (especially on certificated aircraft structural components) is typically performed by personnel certified to NAS 410 or equivalent standards, though AMTs must understand and often perform basic penetrant and magnetic-particle inspections.
Why It Matters
A cracked engine mount that goes undetected does not fail predictably or conveniently. Fatigue cracks grow slowly under cyclic loading until the remaining cross-section can no longer carry peak stress — then failure is sudden and complete. Engine mount cracks have been implicated in accidents involving engine separation, uncontrollable vibration, and loss of control. Regulatory compliance alone does not capture the full safety imperative: mechanics must develop a genuine understanding of where cracks initiate and why, so they can focus inspection effort where it counts.
Equally important is recognizing the limits of each NDT method. Relying solely on visual inspection for a welded steel tube mount that has accumulated high flight hours, sustained a prop strike, or operated in a high-vibration environment is inadequate. Prop strikes in particular require a thorough engine and mount teardown inspection, as the sudden torque spike can initiate cracks at weld toes that are entirely invisible externally.
Common Test Traps
- DPI finds subsurface cracks — FALSE. Dye-penetrant inspection only detects defects that are open to the surface. Subsurface defects require MPI, ECI, or UT.
- Magnetizing in only one direction is sufficient — FALSE. Cracks parallel to the field are nearly invisible; always magnetize in at least two perpendicular directions.
- Rubber isolator condition is cosmetic — FALSE. Failed or oil-contaminated isolators alter load paths, increase metal fatigue, and can cause structural overload at attachment fittings.
- MPI works on aluminum — FALSE. Aluminum is not ferromagnetic; MPI applies only to ferrous (iron/steel) metals. Use DPI or ECI for aluminum components.
- Paint does not need removal for DPI — FALSE. Any coating that seals the crack opening will prevent penetrant entry. The surface must be clean and bare metal for valid DPI results (ECI is the method that can work through nonconductive coatings).