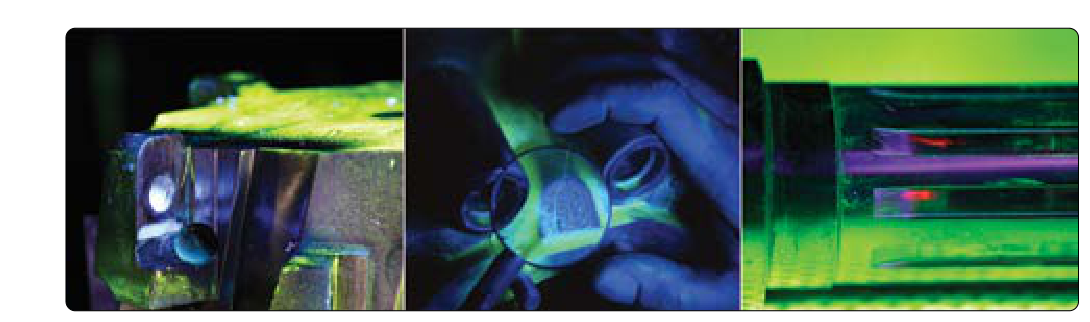
Dye penetrant inspection (DPI), also known as liquid penetrant inspection (LPI), is one of the most widely used non-destructive testing (NDT) methods in aviation maintenance. Its purpose is to detect surface-breaking defects — cracks, seams, porosity, laps, and other discontinuities — in materials that cannot be seen with the naked eye alone. Unlike magnetic particle inspection, dye penetrant testing works on both ferrous and non-ferrous metals, as well as certain non-metallic materials such as plastics and ceramics, making it an especially versatile tool in an aviation maintenance technician's (AMT) inspection toolkit.
The physics behind DPI are elegantly simple: liquid is drawn into tight surface openings by capillary action. When a specially formulated penetrant is applied to a clean surface, it seeps into any crack or void that breaks the surface. After the excess penetrant is cleaned away, a developer is applied to draw the trapped penetrant back out, creating a visible indication that reveals the location, length, and shape of the defect. Understanding the complete procedure — from surface preparation through interpretation — is essential for AMT General knowledge test preparation and real-world safety-of-flight inspections.
Types of Dye Penetrant Systems
The FAA's Aviation Maintenance Technician Handbook — General (FAA-H-8083-30) identifies two primary categories of penetrant systems based on how the indication is made visible:
- Visible (color-contrast) dye penetrant: Uses a brightly colored dye, almost always red, which shows against a white developer background. This system requires no special lighting and is commonly used in field inspections where portability matters. Results are read under normal white light.
- Fluorescent penetrant: Uses a dye that fluoresces — typically bright yellow-green — when exposed to ultraviolet (UV or "black") light. Because fluorescent indications glow vividly against a dark background, this method is far more sensitive and is preferred for critical components and production inspections. Inspection must be performed in a darkened environment using a UV lamp of appropriate intensity.
Penetrants are also categorized by how the excess is removed: water-washable, post-emulsifiable (lipophilic or hydrophilic), and solvent-removable. Solvent-removable visible penetrant kits are the most common portable field kits used by AMTs for spot inspections.
Step-by-Step Inspection Procedure
Step 1: Surface Preparation
This is the single most critical step. Any contamination — oil, grease, paint, oxide scale, or cleaning solution — can seal off surface openings and prevent penetrant entry, producing a false-clear result. The surface must be cleaned by degreasing, then dried thoroughly. If paint or coatings are present, they must be stripped from the inspection area, because penetrant cannot enter a defect that is covered. The temperature of the part also matters: most penetrants are specified to work in a range of approximately 50°F to 100°F (10°C to 38°C), consistent with common penetrant specifications such as ASTM E1417. Working outside this range can reduce the penetrant's viscosity and capillary action, degrading sensitivity.
Step 2: Penetrant Application
The penetrant is applied to cover the entire area of interest by spraying, brushing, or immersion. The penetrant must remain wet on the surface for the entire dwell time — also called penetration time or dwell period. Dwell times are specified by the penetrant manufacturer and can range from as little as 5 minutes up to 60 minutes or more, depending on the material, the type of defect expected, and the penetrant system used. Tight, shallow cracks require longer dwell times than larger, open defects. The penetrant must never be allowed to dry on the surface during the dwell period, as dried penetrant is extremely difficult to remove cleanly.
Step 3: Excess Penetrant Removal
After the dwell time is complete, excess penetrant is removed from the surface — but not from within the defects. This balance is critical: remove too little, and background bleedout will mask real indications; remove too much (by flooding with solvent or excessive scrubbing), and you can wash the penetrant out of genuine defects, producing a false-clear result. For solvent-removable systems, the correct technique is to wipe the surface with a dry, lint-free cloth to remove most of the penetrant, then wipe lightly with a cloth dampened with solvent. Never spray solvent directly onto the surface.
Step 4: Developer Application
Developer serves two functions: it provides a contrasting white background for visible dye systems, and it acts as a blotter — drawing residual penetrant out of defects by reverse capillary action. Developers may be applied as dry powder, aqueous wet developer, or non-aqueous wet developer (commonly supplied in an aerosol can); the choice depends on the penetrant system and application, and no single type is universally the most common. The developer is applied in a thin, even coat. Applying too thick a coat can obscure small indications. After application, a development time is required — typically at least 10 minutes but generally not exceeding about 30 minutes for standard field applications, though longer development may be needed for tight cracks per the manufacturer's instructions. The technician must wait for the development time to elapse before performing the final examination.
Step 5: Interpretation and Evaluation
During and after the development period, the technician examines the surface for indications. Indications appear as red bleed-through marks on the white developer background (visible system) or as glowing marks under UV light (fluorescent system). Not all indications signal a defect requiring rejection — the technician must distinguish between:
- True (relevant) indications: Caused by actual surface-breaking discontinuities. These are evaluated against the applicable inspection standard (manufacturer's structural repair manual, applicable airworthiness directive, or engineering order).
- Non-relevant indications: Caused by geometric features such as press fits, keyways, threads, or intentional surface breaks that trap penetrant. These must be recognized and not confused with cracks.
- False indications: Result from contamination, inadequate cleaning, or improper technique — not from a material defect. These must be eliminated by repeating the test with proper surface preparation.
The shape of an indication provides important diagnostic information. A continuous linear indication suggests a crack or seam. A rounded or dotted indication suggests porosity. A broad, diffuse bleedout can indicate a shallow scratch or a very wide, open discontinuity. The rate of bleedout also matters: a tight crack produces a slow, growing indication during development, while contamination tends to produce immediate, stable staining.
Why It Matters
Aviation structures — airframe components, engine parts, landing gear, control surfaces — are subjected to cyclic fatigue loading throughout their service life. Fatigue cracks typically initiate at the surface, often at stress concentrations such as fastener holes, radii, and weld toes. Dye penetrant inspection allows AMTs to find these cracks while they are still small enough to be repaired or before fracture can occur. Many airworthiness directives (ADs) specifically mandate liquid penetrant inspection as part of recurring maintenance programs. Because the method is relatively inexpensive, portable, and applicable to a wide range of materials, it is a foundational skill described in FAA-H-8083-30 that every AMT must master.
Key Numbers and Rules
- Applicable materials: Non-porous metals (aluminum, titanium, steel, magnesium), plastics, ceramics. Does NOT work on porous materials (wood, unfinished castings with gross porosity) because the entire surface bleeds out.
- Detects only surface-breaking defects: Subsurface cracks require radiographic or ultrasonic inspection.
- Typical dwell time: 5–30 minutes for most field applications; consult the penetrant manufacturer's data sheet.
- Development time: Typically at least 10 minutes and generally not exceeding about 30 minutes, or as specified by the manufacturer.
- Temperature range: Generally 50°F–100°F (10°C–38°C) for standard penetrants.
- Solvent removal technique: Wipe dry first, then wipe with solvent-dampened cloth — never spray solvent directly on part.
- UV lamp intensity for fluorescent inspection: Must meet the minimum intensity specified by the applicable standard (typically checked with a UV light meter).
- Post-inspection cleaning: The developer and any residual penetrant must be removed after inspection, as some developers can be corrosive if left on aluminum or magnesium parts.
Common Test Traps
- Skipping or rushing surface preparation: A common distractor scenario on the knowledge test describes a technician who cleans the part but doesn't dry it — residual moisture or cleaning fluid in defects prevents penetrant from entering, producing a false-clear result.
- Confusing dwell time with development time: These are two distinct and separately timed steps. Dwell time is for the penetrant; development time is after the developer is applied. Mixing them up is a frequent test error.
- Applying developer too thickly: A thick developer coat buries small indications. The test may ask what happens when too much developer is used — the answer is that small defects may not be detected.
- Using dye penetrant on porous materials: The method is not suitable for porous substrates because the entire surface bleeds through, masking any discrete indication. The test may offer wood or a rough casting as an answer choice.
- Believing DPI detects subsurface defects: Dye penetrant inspection reveals only defects open to the surface. A crack completely internal to the part will produce no indication. This is one of the key limitations distinguishing DPI from radiographic or ultrasonic NDT methods.