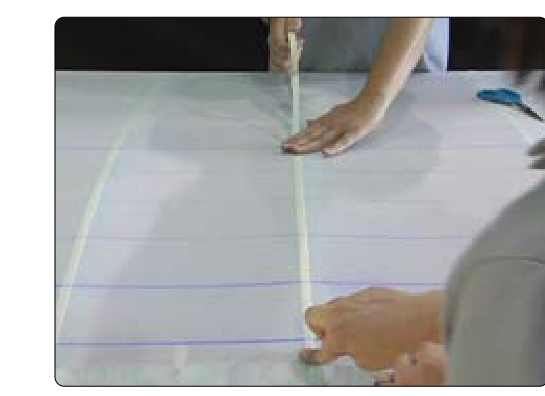
When an aircraft's airframe is covered in fabric, the work does not end when the base cloth is stretched and stitched into place. One of the most critical finishing steps is the application of finishing tape — narrow strips of the same or compatible fabric material placed over seams, rib cap strips, and other high-stress areas before the surface is doped and painted. Understanding precisely where finishing tape goes, why it is required, and how it is applied is essential knowledge both for the AMT Airframe written examination and for anyone performing or inspecting aircraft fabric work in the field.
The FAA's AC 43.13-1B, Acceptable Methods, Techniques, and Practices — Aircraft Inspection and Repair, and the Aviation Maintenance Handbook series provide the technical grounding for fabric-covering practices. What follows is a thorough breakdown of finishing tape requirements, placement logic, and the inspection criteria an airframe technician must master.
What Finishing Tape Is and Why It Exists
Finishing tape is typically a pre-woven, bias-cut or straight-cut strip of the same fabric used as the base covering material — commonly Grade A cotton, polyester (such as Ceconite or Poly-Fiber), or fiberglass cloth, depending on the approved covering system in use. Strip widths are typically specified in the approved covering process data as 2, 3, or 4 inches, with the specific width dictated by the approved data for the aircraft and covering system, as well as the location on the airframe.
The primary purposes of finishing tape are threefold. First, it protects rib-stitch lacing from aerodynamic forces. Rib lacing cord passes through the fabric and over the rib cap, and without a protective tape over it, the slipstream can work at the exposed cord and eventually cause it to fray or loosen. Second, finishing tape seals and reinforces fabric seams — the joints where two panels of fabric meet — preventing the edges from lifting, peeling, or raveling under the constant vibration and airflow a flying aircraft experiences. Third, tape adds localized structural reinforcement at points where stress concentrations are highest, particularly along leading edges and trailing edges where the fabric is under tension and exposed to direct airflow.
Where Finishing Tape Is Placed: Location by Location
Over Rib Cap Strips
The most common and perhaps most critical tape location is directly over each rib, centered on the rib cap strip. After rib lacing is completed, a strip of finishing tape is laid along the entire length of the rib from the leading edge to the trailing edge, encapsulating the lacing knots and cord. The tape must be wide enough to cover all the lacing, with the exact width dictated by the approved covering process data and the rib cap width rather than a single universal figure. The tape is applied with dope, pressed firmly so no air bubbles or loose edges remain, and then additional coats of dope are applied over it to fully bond it to the base fabric.
It is important to note that the tape must lie flat and smooth. Any wrinkles or lifted edges will create aerodynamic disturbances at best and stress risers that can propagate tears at worst. On curved sections of a rib — particularly near the leading edge where the rib bends sharply — the tape may need to be notched or mitred slightly to lie flat, or a bias-cut tape may be used because it conforms to curves more readily than straight-cut tape.
Over Fabric Seams
Wherever two panels of covering fabric are joined — whether by sewing, lapping, or gluing — a finishing tape strip is placed directly over the seam. The tape must be centered on the seam line and wide enough to provide adequate coverage on both sides, with the specific width determined by the approved covering process's instructions rather than a single fixed figure. The reasoning is straightforward: a seam is inherently a weaker line in the fabric envelope, and finishing tape distributes any stress that would otherwise concentrate right at the join, while also preventing the raw or folded edge of the seam from catching air and peeling back.
Leading and Trailing Edges
Leading edges represent the highest-velocity airflow impact on the fabric covering and are particularly vulnerable to abrasion, peeling, and moisture infiltration. Finishing tape is applied along the entire leading edge of each wing panel, typically over the seam where the upper and lower fabric panels wrap around or meet at the leading edge structure. Trailing edges similarly receive finishing tape, though the aerodynamic loading there is lower; the tape still serves to seal the hem or seam and prevent the slight flutter that trailing-edge fabric can develop.
Tips, Bays, and Structural Projections
Wingtips, control surface tips, and any location where the fabric terminates against a structural member or where a protrusion such as an inspection ring or drain grommet interrupts the fabric surface also require tape. Tape wrapped around wingtip bows prevents the fabric edge from lifting away from the tip structure. Around inspection openings, the tape (combined with the inspection ring itself) seals the perimeter and keeps the fabric from tearing under the stresses concentrated at the cutout.
Application Technique and Adhesion
Finishing tape is applied wet — meaning the surface receives a brush coat of the appropriate dope before the tape is laid down, and additional dope is immediately applied on top to thoroughly saturate and bond the tape fibers. On a nitrate or butyrate dope system, the compatible dope is used. On polyester or other synthetic covering systems, the manufacturer's approved adhesive (often a heat-activated or brush-on cement) is used instead, strictly per the Supplemental Type Certificate (STC) or manufacturer's instructions.
The technician should work the tape from the center outward with a fingertip or brush to expel any trapped air. Edges must be pressed firmly and checked after partial drying; any lifted edge must be re-wetted with dope and pressed down before proceeding. All finishing tape must be fully saturated so that it becomes integral with the base fabric once cured — a tape that is merely surface-glued can peel and create a dangerous in-flight hazard.
Why This Matters for Safety and Airworthiness
Improperly applied or missing finishing tape is not a cosmetic problem — it is an airworthiness defect. An unsupported rib stitch can work loose under vibration, and if multiple stitches fail, the fabric can balloon or separate from the rib, destroying the aerodynamic profile of the wing and potentially causing structural failure at higher speeds. A peeling seam tape can catch the slipstream, act as a spoiler, and in extreme cases delaminate an entire panel. The FAA has recorded incidents directly attributable to fabric-covering failures, which is why AC 43.13-1B specifies tape placement with such precision and why annual inspections of fabric-covered aircraft require careful examination of all tape edges and seams.
For the AMT, recognizing proper tape placement during an inspection means checking that: every rib has continuous tape from leading to trailing edge; all seam tapes are present, centered, and fully adhered with no lifted edges; and all structural boundaries (wingtips, control surface tips, inspection openings) are properly taped and sealed.
Key Numbers and Rules
- Minimum tape width over ribs: wide enough to cover the rib cap and all lacing cord; the exact width is dictated by the approved covering process data and rib cap width rather than a single FAA-mandated figure — commonly specified as 2, 3, or 4 inches in approved covering manuals.
- Minimum tape width over seams: determined by the specific approved covering process's instructions; there is no single FAA-mandated universal minimum width in AC 43.13-1B.
- Application medium: compatible dope or manufacturer-approved adhesive; tape must be fully saturated, not just surface-bonded.
- Leading and trailing edges: tape required for the full span of each fabric panel.
- Inspection openings and wingtip bows: tape required around the full perimeter.
- Bias-cut tape: preferred or required on curved surfaces to allow conforming without wrinkles.
- Approved data: all placement and width specifications must match the aircraft's Type Certificate Data Sheet (TCDS), the STC data if an alternative covering system is used, or AC 43.13-1B as the acceptable standard practice.
Common Test Traps
- Tape width is not one-size-fits-all. The exam may present a single generic width as the universal requirement. In reality, width depends on location, rib cap width, and the approved covering system's specifications.
- Finishing tape is NOT optional on seams. Some students assume that a lapped and doped seam is sufficient without tape. The tape is always required over seams in standard practice.
- Bias-cut vs. straight-cut confusion. Straight-cut tape on tight curves will wrinkle and lift; bias-cut tape conforms. Knowing when each is appropriate is a tested concept.
- Tape must be saturated, not just surface-applied. A common mistake — and a common wrong answer on the exam — is treating finishing tape as merely decorative overlay rather than a structural laminate that must be fully bonded through its thickness.
- Approved data governs. If the aircraft uses an STC'd synthetic covering system, AC 43.13-1B methods do not automatically apply; the STC holder's data takes precedence. The exam tests whether technicians know to consult approved data first.