Modern aircraft rely heavily on composite structures — carbon fiber fuselage skins, fiberglass control surfaces, Kevlar fairings — and the quality of those structures depends almost entirely on how well the laminate is compacted before and during cure. Two techniques stand at the heart of composite fabrication quality: vacuum bagging and debulking. Understanding both processes — not just as procedural checklists but as physical phenomena — is essential for any AMT working with non-metallic structures and is directly tested on the FAA Airframe Knowledge Exam.
This article walks through the mechanics of how a vacuum bag system works, what debulking accomplishes at the molecular and structural level, how each component of the bagging assembly contributes to the final part, and what can go wrong when shortcuts are taken. Every principle here is grounded in the FAA Aviation Maintenance Technician Airframe Handbook (FAA-H-8083-31).
Why Atmospheric Pressure Is the Real Tool
A common misconception is that a vacuum bag "sucks" resin or fiber into place. In reality, a vacuum pump merely removes air from inside the bag, and the surrounding atmospheric pressure — approximately 14.7 psi at sea level — presses inward uniformly from all directions. This distinction matters: you are not pulling; the atmosphere is pushing. The practical maximum compaction force available is one full atmosphere, which equates to roughly 2,100 pounds of force per square foot of laminate surface. That is a considerable and highly uniform clamping force that no mechanical press can replicate over a complex contoured surface.
Because the pressure is atmospheric and acts on every square inch of the bag surface simultaneously, it conforms to complex curves and compound angles that rigid tooling cannot easily reach. This is why vacuum bagging is so well suited to aircraft-grade composite fabrication, where aerodynamic contours are the rule rather than the exception.
Components of a Vacuum Bag Assembly
A properly assembled vacuum bag system is a stack of materials, each serving a distinct engineering purpose. Working outward from the tool surface toward the bag, the typical assembly consists of the following layers:
- Release agent or release film: Applied directly to the tool, release agent (wax, liquid PTFE, or a peel-ply release film) prevents the cured laminate from bonding permanently to the mold. Without it, removing the part risks tearing the surface plies.
- Laminate plies: The actual composite material — prepreg tape, woven fabric, or wet layup plies — placed and oriented per the structural repair manual (SRM) or engineering drawing. Fiber orientation is critical; deviating even a few degrees from the specified angle significantly reduces strength.
- Peel ply (optional but common): A tightly woven nylon or polyester fabric that bonds lightly to the laminate surface during cure. When peeled away after cure, it leaves a clean, slightly textured surface that is ideal for secondary bonding or painting without additional abrasion.
- Release film / perforated film: Placed over the peel ply to control resin bleed-off. A non-perforated film prevents any resin from migrating upward; a perforated film allows controlled bleed. The choice depends on whether the process targets a resin-rich or net-resin laminate.
- Breather / bleeder cloth: A non-woven mat of polyester or fiberglass that serves two purposes simultaneously. As a bleeder, it absorbs excess resin that migrates through the perforated film. As a breather, it creates a continuous air pathway across the entire bag so the vacuum pump can evacuate air from the whole surface — not just the area immediately adjacent to the vacuum port. Without continuous breather coverage, portions of the laminate can become isolated from the vacuum source, resulting in voids.
- Vacuum bag film: The outer envelope, typically a nylon or polyamide film chosen for its temperature rating and flexibility. The bag must be large enough to accommodate any contours without bridging — a condition where the bag pulls taut across a concave corner rather than conforming to it, leaving a gap where the laminate receives no compaction pressure.
- Sealant tape (tacky tape): A butyl-based, putty-like tape that forms the airtight seal between the bag film and the tool flange. Proper application — without folds or gaps — is one of the most critical hands-on skills in composite work. Even a small leak degrades vacuum pressure and may render the part unairworthy.
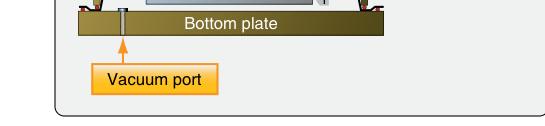
- Vacuum ports and fittings: Typically one or more through-bag fittings that connect to vacuum hose and ultimately to the pump. For large or complex parts, multiple ports prevent pressure differentials across the laminate.
Achieving and Monitoring Vacuum Pressure
Once the bag is assembled and sealed, the vacuum pump is started and the technician monitors the vacuum gauge. Industry practice for composite aircraft repair typically targets a minimum of 22–26 inches of mercury (in. Hg) vacuum, though the specific repair documentation must be consulted because some resin systems or core materials require tighter tolerances. Full atmospheric pressure at sea level is approximately 29.92 in. Hg, so a reading of 25 in. Hg means the bag interior is at roughly 4.92 in. Hg absolute — a substantial pressure reduction that drives atmospheric pressure firmly against the laminate.
After reaching target vacuum, the technician should perform a vacuum leak check by closing the valve to the pump and observing whether the gauge holds steady. A rapid drop indicates a bag leak that must be found and sealed before cure begins. Leak detection is done by listening, feeling, or applying soapy water near seams and ports. The FAA-H-8083-31 handbook emphasizes that maintaining consistent vacuum throughout the cure cycle is non-negotiable for structural integrity.
Debulking: Compacting the Laminate at Intermediate Stages
Debulking refers to the process of applying vacuum pressure to a partially completed laminate — before all plies are laid up — to consolidate the plies already in place and remove trapped air. Rather than laying up all plies at once and bagging only at the end, the technician periodically pauses, applies the vacuum bag, pulls vacuum, and allows the laminate to compact for a specified dwell time (commonly 10–20 minutes, though the SRM governs).
Why is this necessary? As each ply is placed, microscopic air pockets become trapped between layers. In a thick laminate — anything beyond four or five plies — a final bag-only cure may not be able to collapse these interior voids because the outer plies have begun to partially gel and act as a barrier. Debulking after every three to five plies (or at intervals specified by the SRM) allows the vacuum pressure to work on a thinner, more compliant stack, effectively pushing out air before the next set of plies locks it in place.
Debulking is especially critical in areas where fabric must conform to tight radii or complex double-curvature surfaces. Fiber bridging — where fabric spans a concave corner rather than conforming to it — creates a void under the ply. Debulking under vacuum with hand pressure or a squeegee on the bag surface encourages the fabric to conform before it is locked in position by subsequent plies.
Why These Processes Matter for Structural Integrity
Voids in composite laminates are not merely cosmetic defects. A void percentage exceeding approximately 2–4% by volume causes disproportionate reductions in interlaminar shear strength — the resistance to layers sliding against each other — which is a primary failure mode in composite structures under bending loads. Excessive void content is well documented to disproportionately reduce interlaminar shear strength, though FAA-H-8083-31 does not specify a precise percentage relationship. Because interlaminar shear failures are difficult to detect visually and may propagate slowly under fatigue loading, preventing voids at the fabrication stage is far preferable to inspecting for them afterward.
Proper vacuum bagging and debulking also control the fiber volume fraction — the ratio of reinforcing fiber to total laminate volume. Higher fiber volume fractions (more fiber, less resin) produce stronger, stiffer, and lighter laminates. Too much resin adds weight without proportional strength; too little leaves fibers insufficiently wetted. The vacuum bag and bleeder system work together to squeeze the laminate to its optimal fiber-to-resin ratio, which for aircraft-grade wet layup systems is typically around 50–60% fiber by volume.
Key Numbers and Rules
- Atmospheric pressure at sea level: ~14.7 psi or ~29.92 in. Hg — the driving force in vacuum bagging.
- Typical target vacuum: 22–26 in. Hg minimum; always defer to the SRM or manufacturer's data.
- Void content limit: Generally must remain below 2–4% by volume for structural laminates; even small exceedances significantly degrade interlaminar shear strength.
- Debulk interval: Every 3–5 plies is a common guideline; the SRM specifies the exact interval for each repair type.
- Debulk dwell time: Typically 10–20 minutes under full vacuum; resin system and temperature govern the actual value.
- Leak check: After sealing the bag, close the pump valve and confirm the gauge holds steady — any detectable drop requires finding and sealing the leak before proceeding.
- Bag film temperature rating: Must match or exceed the cure temperature; standard nylon bag film is suitable for room-temperature or low-temperature cures; elevated-temperature prepreg cures require elevated-temperature bag film.
Common Test Traps
- Breather vs. bleeder confusion: The FAA exam distinguishes between these functions. Breather provides the continuous air path to the vacuum port; bleeder absorbs excess resin. One material can perform both functions, but understanding the distinction is tested.
- Bridging is a bag problem, not a resin problem: Test questions may describe a void at a corner and ask the cause. Bridging of the bag film — not under-wetting — is the answer when the defect is at a concave radius.
- Vacuum measures the difference, not absolute pressure: The gauge reads inches of mercury below ambient. A reading of 25 in. Hg does not mean 25 in. Hg absolute pressure is present; it means 25 in. Hg below the current ambient.
- Debulking is not the same as the final cure bag: Debulking is an intermediate compaction step performed before layup is complete. Confusing it with the final cure setup is a common knowledge-test error.
- Altitude affects maximum achievable vacuum: At higher elevations, ambient atmospheric pressure is lower, so the maximum vacuum gauge reading and the resulting compaction force are both reduced. This is especially relevant for maintenance facilities at high-elevation airports.