Honeycomb sandwich panels are prized in aircraft construction for their exceptional strength-to-weight ratio. A thin face sheet bonded to each side of a lightweight honeycomb core creates a structure that resists bending loads remarkably well — but that same lightweight core presents a challenge whenever a concentrated force must be transferred into the panel. A simple bolt passing through hollow honeycomb cells would crush the thin cell walls, spread the load across almost no material, and quickly fail. The engineering solution is the potted insert: a carefully prepared cavity filled with structural adhesive or potting compound that surrounds the fastener, distributes its load across many cell walls, and restores the structural integrity the hole would otherwise destroy.
Understanding how to properly install potted inserts and select compatible fasteners is essential knowledge for any AMT working on composite airframe structures. The technique appears on transport-category aircraft interior panels, control surfaces, flooring, and fairings — the secondary structure applications where honeycomb sandwich construction is most commonly found. This article walks through the mechanics, materials, procedures, and inspection considerations the FAA expects technicians to know.
How Honeycomb Panels Carry Load — and Where They Fall Short
A honeycomb sandwich panel functions much like an I-beam. The two face sheets act as flanges, carrying tension and compression loads in bending, while the core acts as the web, resisting shear and keeping the faces separated at a fixed distance so their moment arm remains large. When loads are distributed — as in aerodynamic pressure across a control surface — the face sheets handle them gracefully.
Concentrated loads are a different story. When a bolt pulls perpendicular to the panel face (pull-through loading), or when a fastener tries to pull parallel to the face (shear loading), the core must resist that load at a single point. Honeycomb core — whether aluminum, Nomex aramid paper, or fiberglass — has very little bearing strength in a small, localized area. Without reinforcement, the face sheet peels away from the core, or the core itself collapses, typically at load levels far below the design limit of the panel as a whole.
Potted Inserts: Concept and Types
A potted insert fills the void created by a fastener hole with a hardened structural material, usually an epoxy-based potting compound, that bonds to the surrounding cell walls and the inner surfaces of both face sheets. Once cured, the compound forms a solid plug that spreads the fastener's load into a much larger volume of core material. The insert itself is typically a metallic or composite threaded bushing, nut plate, or sleeve that is embedded in the potting compound and provides the actual bearing surface for the fastener.
Inserts are broadly categorized by installation method:
- Potted (wet-installed) inserts: The technician drills or cuts the hole, removes a controlled amount of core, injects or packs potting compound into the cavity, and sets the insert while the compound is still wet. Cure time and temperature are critical.
- Blind-installed mechanical inserts: Some designs use a self-contained insert that can be installed from one side, much like a blind rivet, and then backfilled with potting compound to improve pull-out strength.
- Through inserts: Where panel thickness is small and both sides are accessible, a through-bolt with large-area washers on both faces may be used, though potting is still often added to prevent core migration over time.
Installation Procedure — Step by Step
The specific procedure varies by aircraft manufacturer and Structural Repair Manual (SRM) requirements, but the general process recognized by FAA guidance follows these stages:
- Identify the design requirement. The SRM specifies the insert part number, potting compound type, drill diameter, cavity diameter, and cure requirements. Never substitute materials without engineering approval — different compounds have different stiffness, temperature ratings, and bond characteristics.
- Drill the pilot hole. Use a sharp, properly sized drill and drill guide to create a clean hole perpendicular to the panel surface. A wandering or oversized hole weakens the surrounding core and may move the fastener off its designed location.
- Countersink or counterbore the face sheet if the insert is designed to sit flush with the surface. This is common on aerodynamic surfaces where protrusions are unacceptable.
- Remove core material to create the potting cavity. A special stepped drill or a router is used to enlarge the hole through the core only, leaving the opposite face sheet intact. The cavity diameter is specified entirely by the SRM or applicable engineering data for that aircraft and part — there is no standard multiplier of fastener diameter that applies generally — and the cavity must not undercut or damage either face sheet.
- Clean the cavity thoroughly. Remove all core debris, dust, and contaminants. Compressed air and a clean brush are commonly used. Any contamination will reduce bond strength of the potting compound.
- Mix the potting compound. Two-part epoxy systems must be mixed at the exact ratio specified by the manufacturer. Off-ratio mixing degrades mechanical properties significantly. Mix completely for the specified time, avoiding entrained air bubbles where possible.
- Fill the cavity. Inject or pack the compound into the cavity until it slightly overfills. A syringe applicator gives good control and reduces voids. Voids in the cured potting compound create stress concentrations that can lead to premature cracking or pull-out failure under repeated loading.
- Set the insert. Press the insert into the wet compound, rotate it slightly to ensure complete contact, and position it precisely. Some inserts have flange features that seat flush against the face sheet inner surface to resist pull-through directly.
- Allow full cure before applying load. The SRM specifies minimum cure time and temperature. Elevated-temperature cure may be required for high-performance epoxies. Applying torque or load before the compound is fully cured can shift the insert, create voids, and dramatically reduce pull-out strength.
- Inspect and finish. After cure, the technician inspects for proper insert position and flush installation, then applies any specified sealant, primer, or protective coating before installing the fastener.
Fastener Selection for Honeycomb Panels
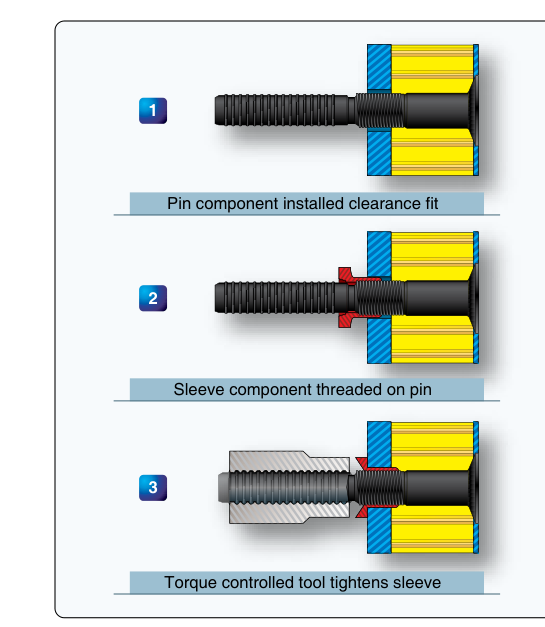
Fasteners used with potted inserts must be matched to the insert thread size and the panel's structural requirements. Several factors differentiate honeycomb-panel fasteners from standard sheet-metal fasteners:
- Length: The fastener must engage the full thread depth of the insert without bottoming out or protruding through the opposite face sheet where it is not desired.
- Head bearing area: Wide-flange heads distribute the clamp load across a larger area of the face sheet, reducing the risk of face sheet dimpling under torque.
- Torque values: Because potted inserts can rotate in the compound if over-torqued — especially before the compound achieves full cure — SRM-specified torque values for honeycomb applications are often lower than standard torque charts for solid structure. Always reference the specific installation document.
- Nut plates: Many honeycomb panel designs use riveted or bonded nut plates on the inner face sheet rather than free-spinning nuts that could be impossible to access. The nut plate must be compatible with the panel face sheet material to avoid galvanic corrosion problems.
- Material compatibility: Using aluminum hardware with carbon fiber face sheets creates a galvanic corrosion risk. Titanium or corrosion-resistant steel fasteners are typically specified in these applications, and the SRM will call them out explicitly.
Why It Matters — Safety and Airworthiness
Improperly installed potted inserts are a significant source of in-service structural discrepancies in composite airframes. A pull-out failure of an insert attaching a flight control fairing, a cabin floor panel, or an access door can result in parts departing the aircraft in flight, secondary damage to other structure, or injury to occupants. The FAA and aircraft manufacturers require that insert installations be performed by appropriately rated and trained personnel following approved data — typically the SRM or a Designated Engineering Representative (DER)-approved repair instruction.
Repeated loading cycles are especially harsh on inadequate installations. Vibration, thermal cycling (which causes differential expansion between the insert metal, the potting compound, and the composite face sheets), and moisture intrusion all degrade the bond between compound and core over time. This is why inspections of honeycomb areas prone to concentrated loads are specifically called out in many aircraft maintenance programs.
Key Numbers and Rules
- The potting cavity diameter is specified entirely by the SRM or applicable engineering data — there is no universal FAA-published multiplier of fastener diameter.
- Potting compound must be mixed at the exact manufacturer-specified ratio; deviations degrade strength substantially.
- Never apply fastener torque until the potting compound has reached full cure per the time/temperature schedule.
- Torque values for honeycomb insert applications are often lower than standard torque charts — always use SRM-specified values.
- Carbon fiber face sheets require titanium or CRES fasteners to prevent galvanic corrosion.
- Void acceptance limits and disposition (repair vs. removal and reinstallation) are determined by the applicable SRM or manufacturer's inspection data, not by a single universal rule.
Common Test Traps
- Using standard torque tables on honeycomb inserts: Standard torque tables are for solid structure. The FAA tests whether you know to defer to the SRM for potted insert torque values, which are frequently lower.
- Assuming a through-bolt with washers is always acceptable: Large washers help distribute load but are not a substitute for proper potting in most applications. The SRM will specify which method is approved for a given location.
- Undersizing the potting cavity: The pilot hole diameter is for the fastener; the potting cavity is larger and its size is dictated by the SRM. Confusing these two dimensions is a common mistake that results in insufficient potting volume and reduced pull-out strength.
- Loading an insert before full cure: Applying torque or any mechanical load before the specified cure time has elapsed can shift the insert and introduce voids, both of which reduce structural integrity — even if the compound appears hardened on the surface.
- Ignoring galvanic compatibility: On carbon fiber composite panels, aluminum fasteners or inserts will corrode rapidly. The test may ask about material selection, and the correct answer requires understanding galvanic series relationships in composite structure.